Maureen at Modecor Muses
Storage and a Log Wall Removal…YIKES!
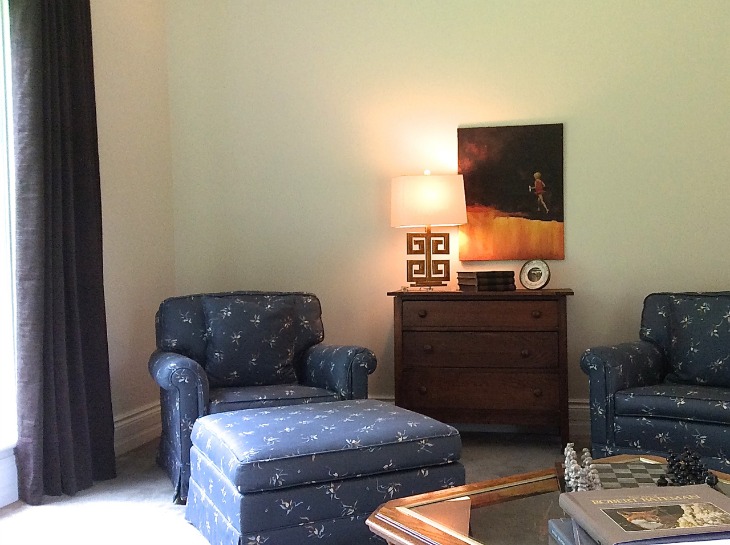
I need more storage at the cottage. Not a lot of storage, just a bit. As you may know if you follow me, we are downsizing to a condo and some of our dishes will not be invited. I can’t bear to part with my red and white transfer ware collection…so I need a spot at the cottage to show them off. This beautiful antique pie cupboard will fit the bill. But I have to remove some logs before she will be comfortable in her new abode.
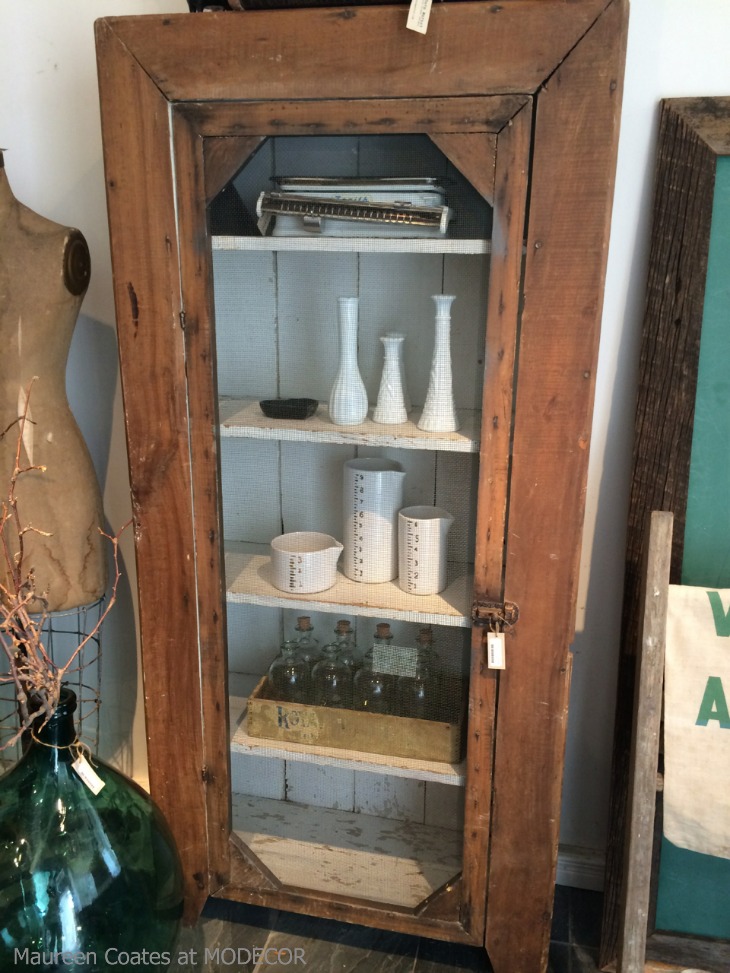
When I spied this pie cupboard in Almonte at Tin Barn Market, I knew I need look no further. It was close to the perfect size, had the character and history I was looking for and needs very little fix up. I am on the hunt for some vintage wire screening however.
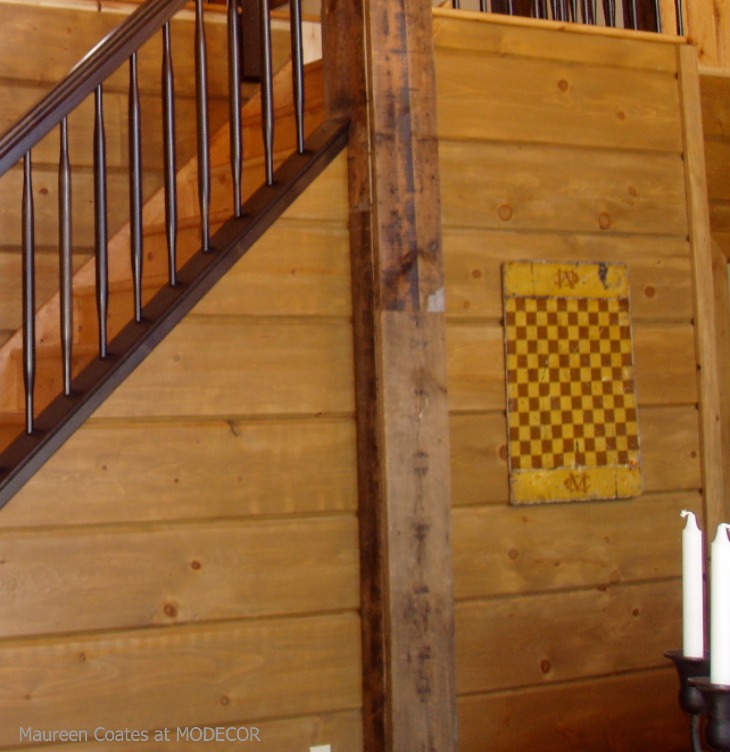
She’s going here, on the right side of the post, where the irregular checker board is situated now. Notice the initials on the checker board…MC…top and bottom…Mike and Maureen Coates. I will find another suitable spot for this weird, but meaningful find.
 Problem is, I need my new showpiece to be inserted into the logs so she will not jut out into the room. I’m especially anal about tight spaces and allowing for traffic flow, but I’m also especially anal about having this pie cupboard in exactly this location. In fact, this is the ONLY wall in the cottage suitable for the pie cupboard. Truth be told, I have never been fussy about ALL the log walls in the cottage, I wanted more painted walls, but Mike really wanted a ‘cabin’ feel, so I acquiesced…. for 8 years.
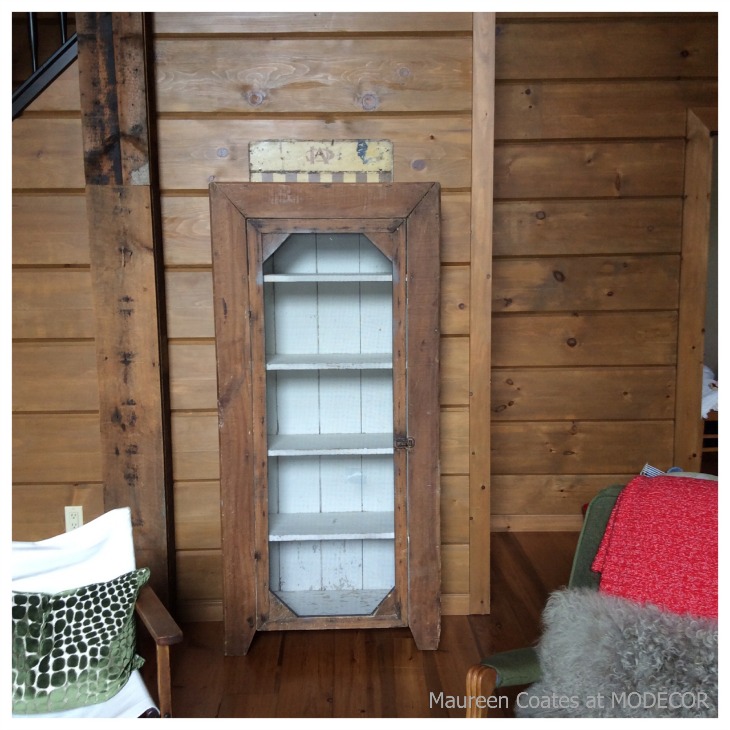
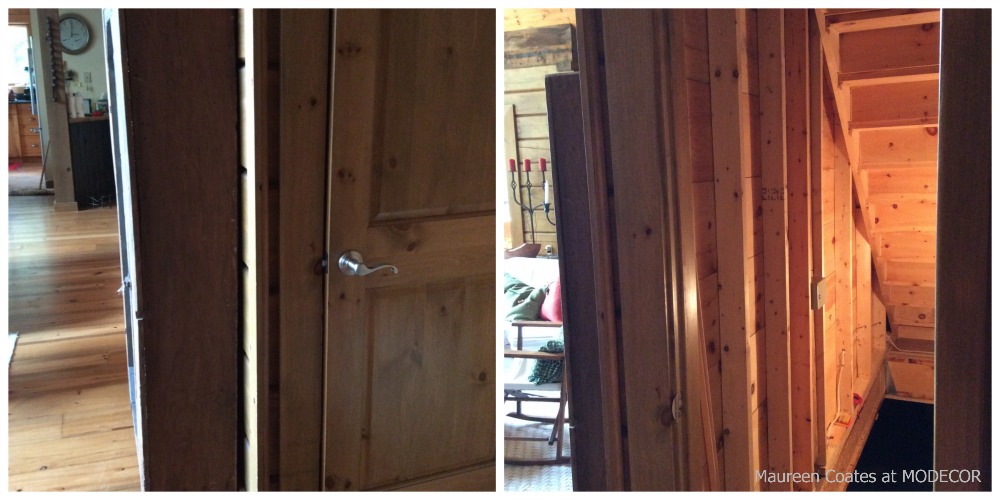 This is what I’m doing…..well in fact my son-in-law Jordan is doing this weekend, with my project managing skills. In the stairway leading down to the basement, he’ll be adding two new studs, and a header, taking down 2 original studs, cutting away the log siding in between the two new studs, trimming off some of the bottom of the pie cupboard and inserting into place. I will then paint the exterior in Annie Sloan Chalk Paint and finish off with a dark wax. Very soon this sweet pie cupboard will be displaying my red and white transfer ware collection ….and perhaps a few home baked pies.

Edit, Edit, Edit!!!
Designers are often hand holders. At times, clients who are very attached to personal items have a difficult time letting go. We as designers have to gently encourage the client to ‘remove the forest in order to see the trees’, as it were. This past week I was involved in styling the living spaces of a home with Sonya Kinkade Design where we literally removed the forest inside, in order to view the trees outside. The home is 30+ years old on a beautiful property in a rural setting, nestled along the Madawaska River. The task was to make pretty the living spaces (lower level) for guests arriving after a family wedding. There was no time for renovating or purchasing new furniture…a major facelift with paint and furniture and accessory arrangement would have to suffice.
Sonya specced one colour for all the walls and another for trim, purchased pre-made drapery panels, a few lamps, pillows and minimal accessories. The remaining magic was achieved through strict editing…..and this is where the hand holding came in to play.
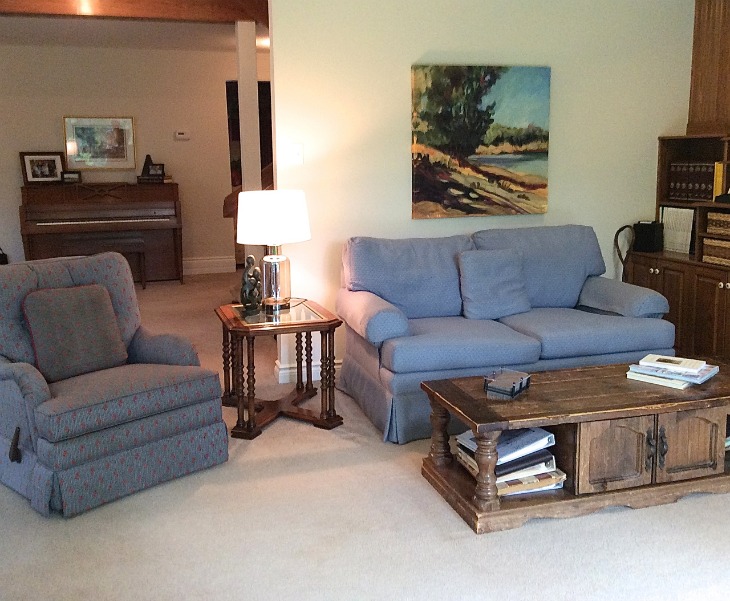
Living Room Before
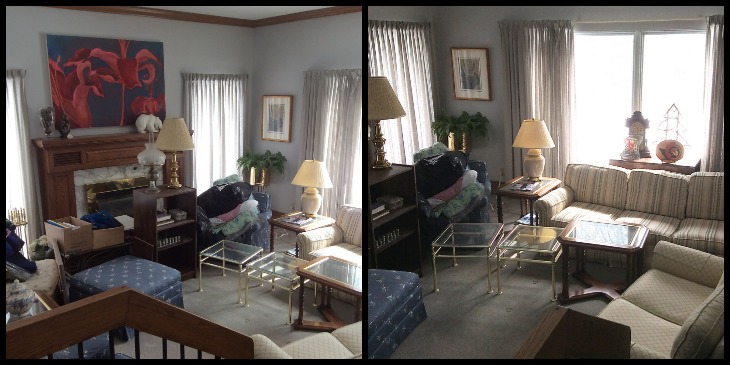 The rooms have dark oak fireplace mantels and surrounds, trim and doors, all original to the home. The clients have an abundance of silk flowers, gifted accessories, Christmas decorations, dated prints, family and friends photographs and furniture. We were tasked to make the rooms appealing, on a budget, using what was available except for the minor purchases mentioned above. We were given carte blanch with regards to moving furniture and clearing out the clutter, however, we were very much aware that we were also editing some beloved items. When we arrived Tuesday, the painting was complete which made a HUGE difference to the overall look of the spaces. (The above photos show a jumble of furniture, where in fact, the furniture had been pushed into the middle of the room)
Living Room After
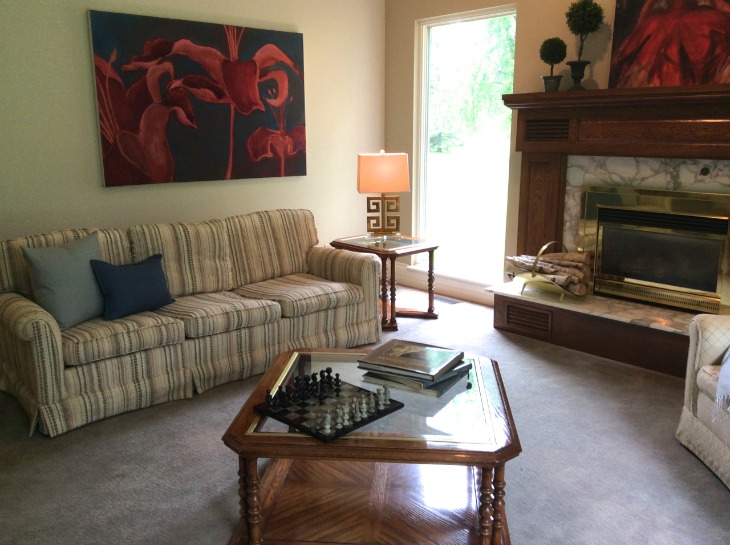
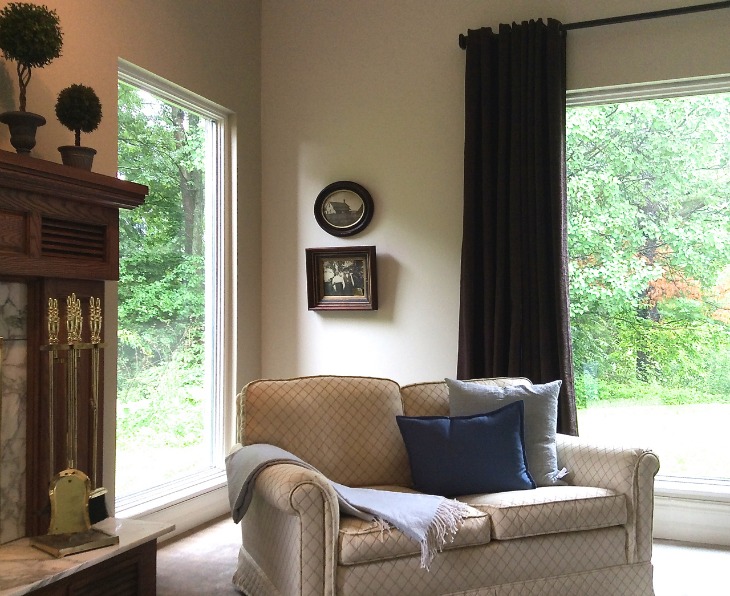
 Remember, we were not designing a new spaces. No new furniture was sourced or bought. We were using existing furniture and artwork, books and accessories in order to update and redefine the space. The wall colour went from grey to cream. A few items of furniture were removed entirely and others were added to the space. The original sheers were removed from all the windows and chocolate brown side panels now frame the large picture window. The side windows were purposely left uncovered. The views from the Living Room have now been capitalized…the forest has been removed to see the trees.
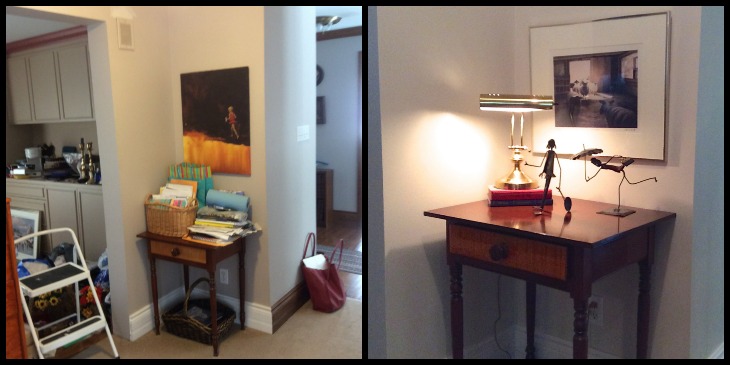
Front Hall Before and After
 This antique mirrored chest found a new home in the front hall. New candle sticks and candles are accompanied by existing carved wooden balls.
Family Room Before
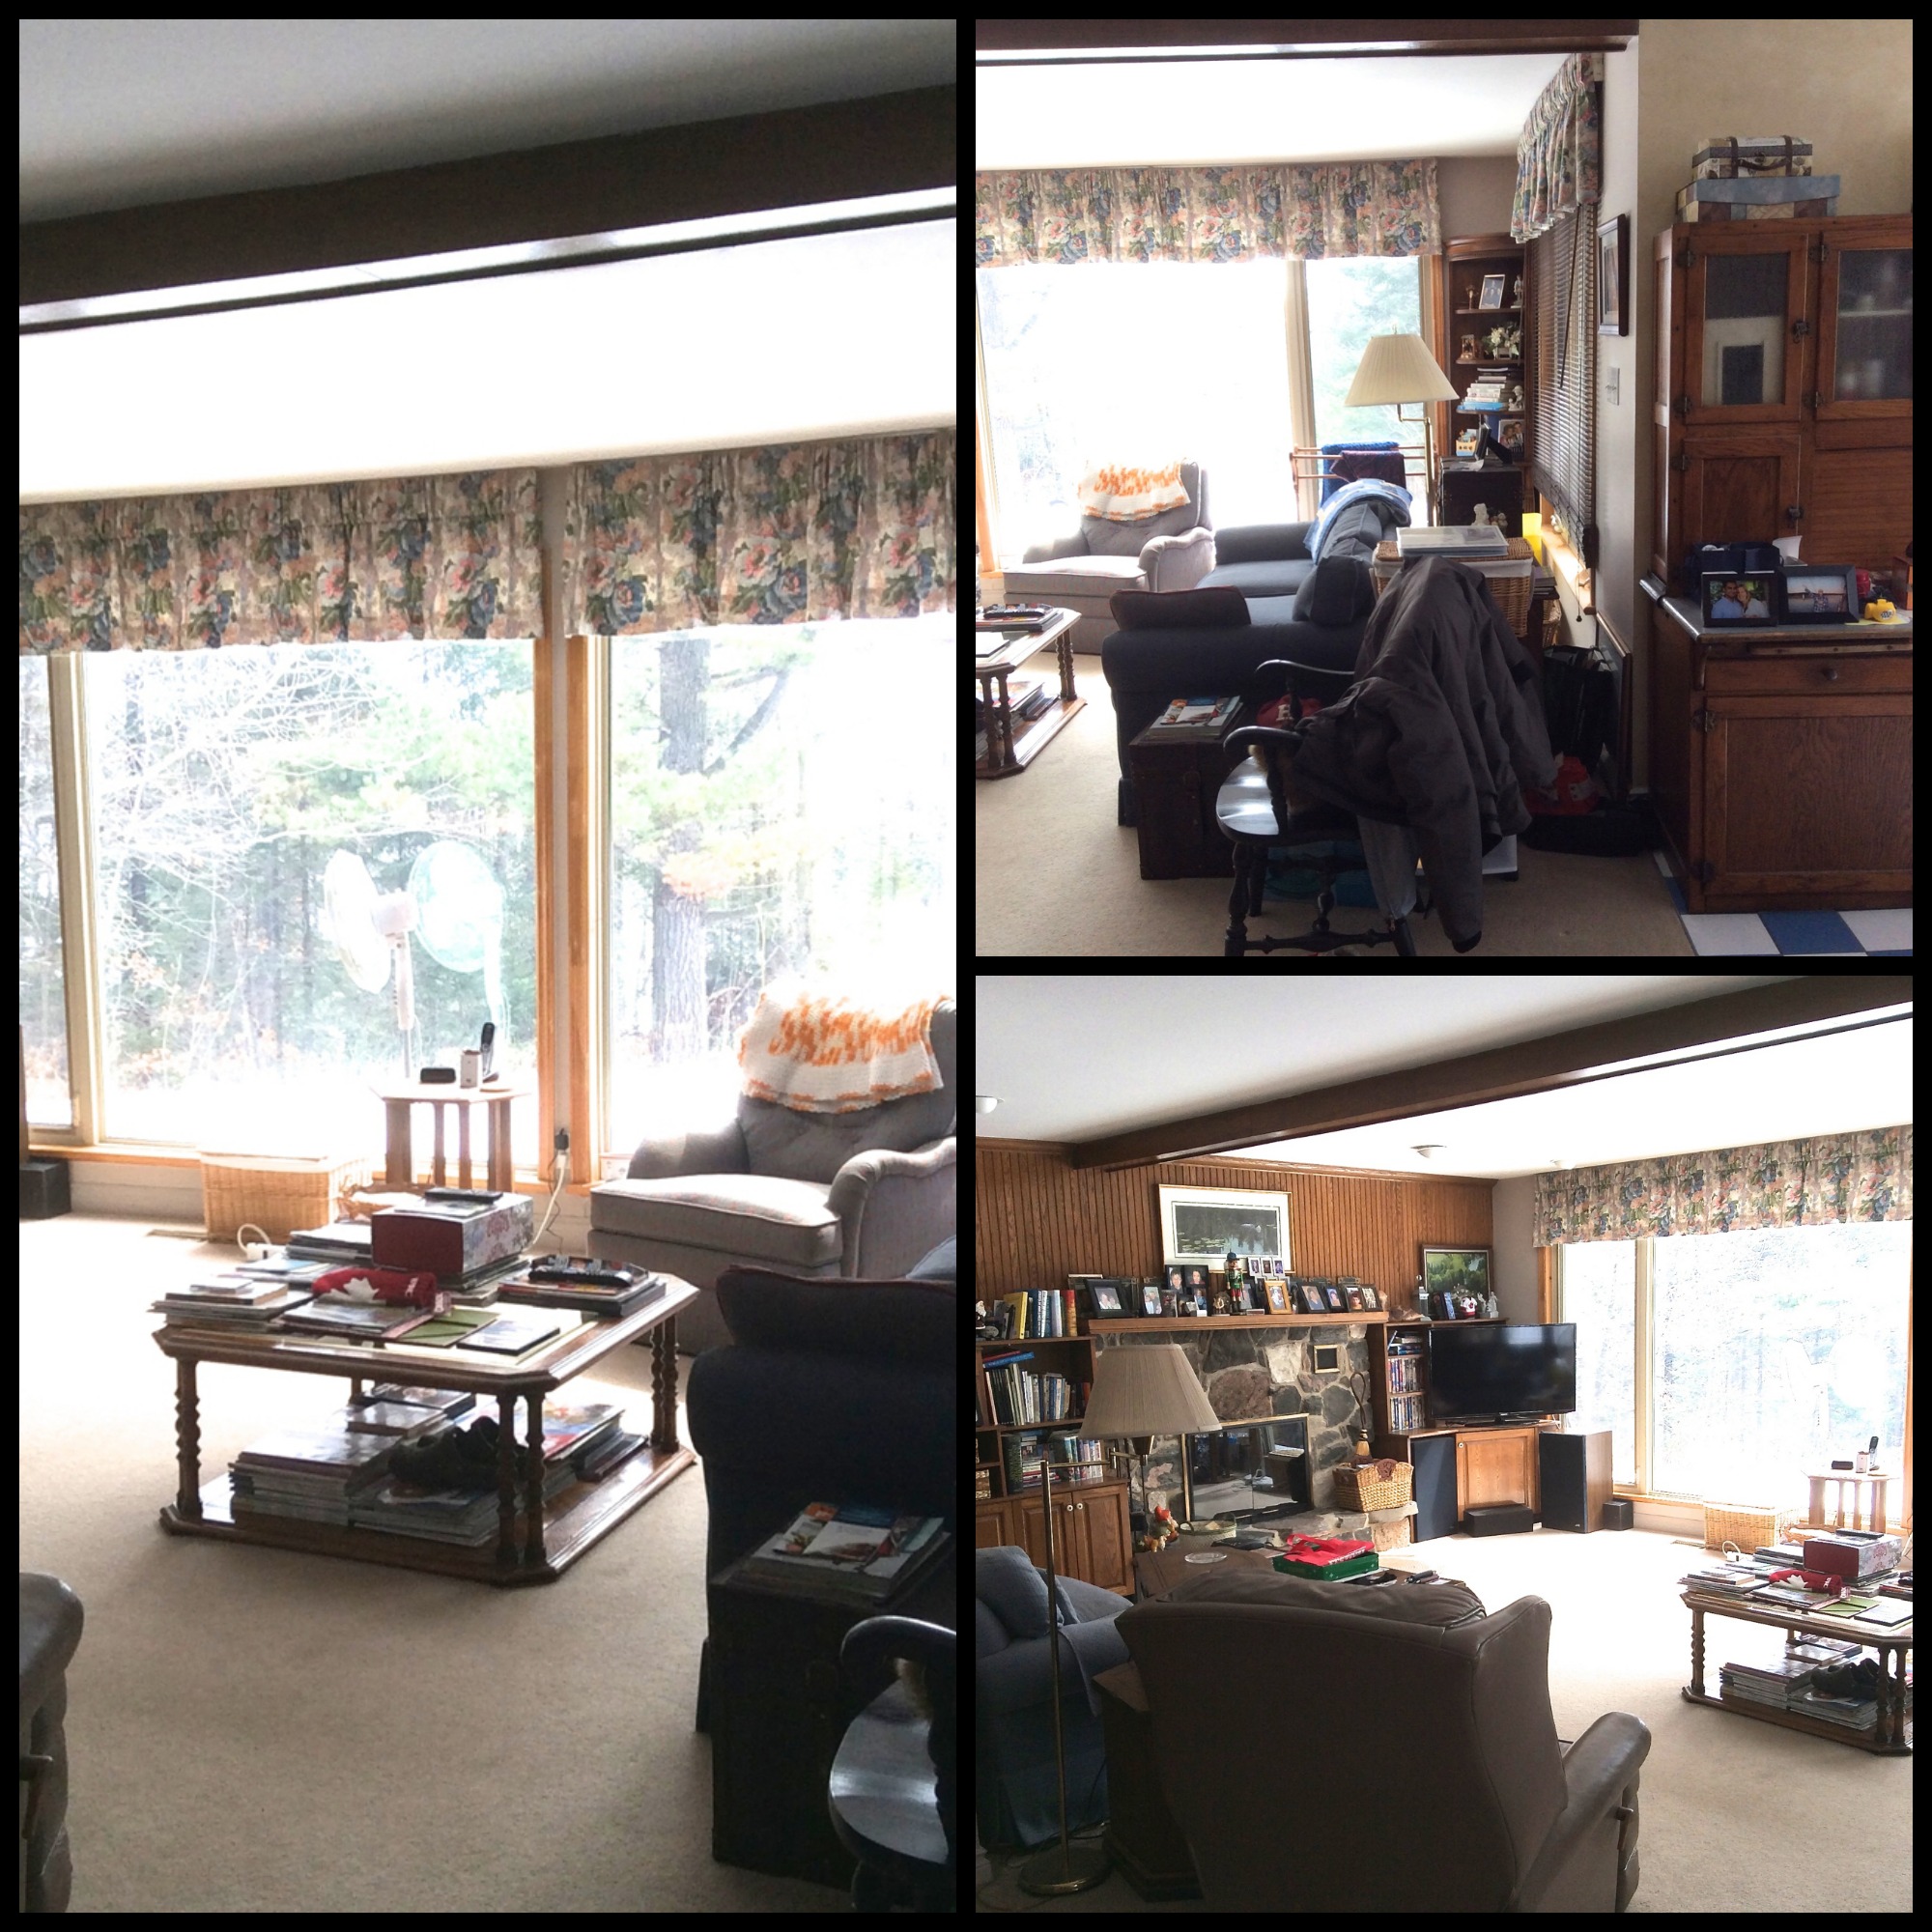
Family Room After
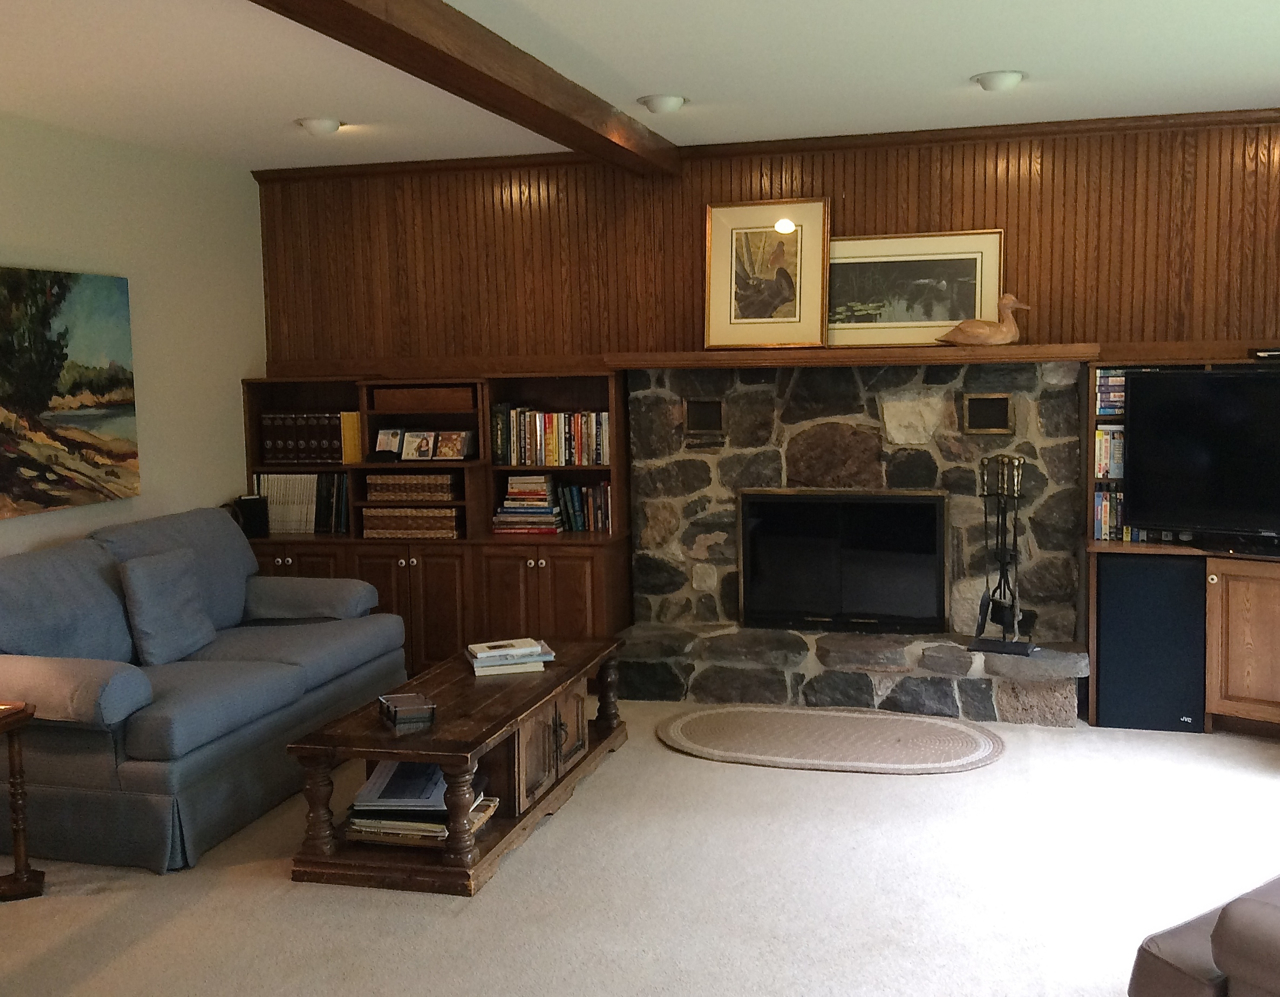
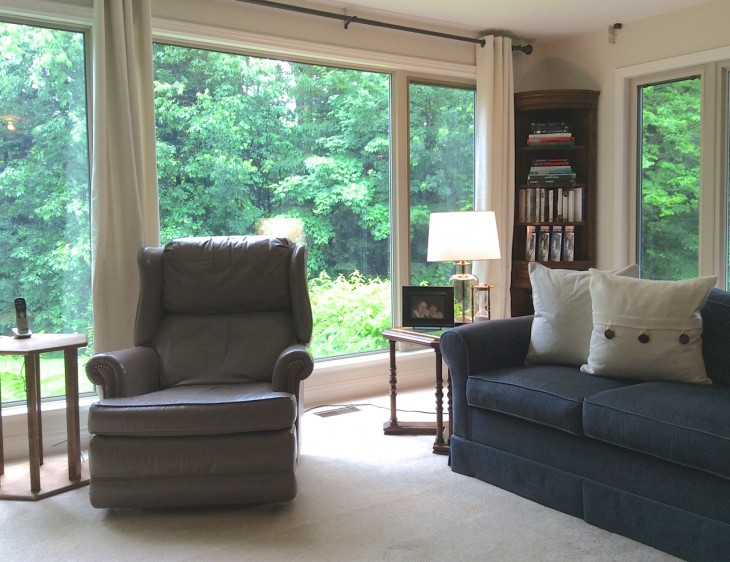
 Again, the view from the Family Room is spectacular and Sonya and I endeavoured to make it the focal point by editing the clutter to see the view. We removed all of the photos and tchotchkes from the mantel then reorganized all the books. The outdated and dusty ruffled valances were replaced with cream side panels on the picture window. Side tables from he Living Room were repurposed here. New artwork was hung and a few pillows were added.
The Side Hall Before and After
 Everything old is new again in this vignette. The desk lamp, books, framed print and metal sculptures were sourced from other rooms placed on the table to redefine this little nook.
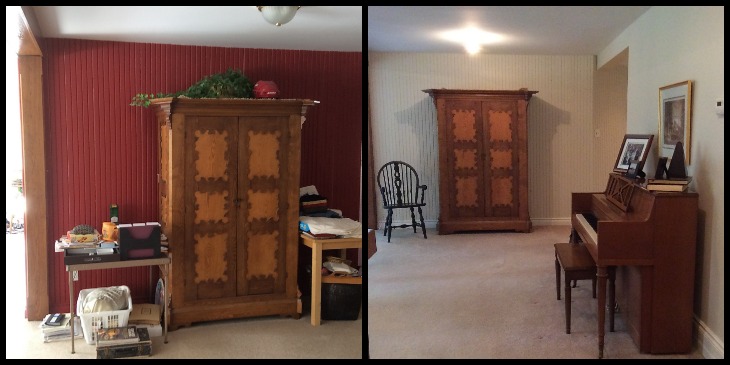
Red wall begone. Armoire and surrounding space is completely edited. New light fixtures are still to be hung.
The clients were thrilled with the transformation. We’re not 100% positive that the ‘forest” will not make it’s way back into these spaces. With encouragement and some hand holding on our part, we may have convinced the owners that their spectacular view is worth the continual editing.
How to MacGyver Store Bought Window Treatments
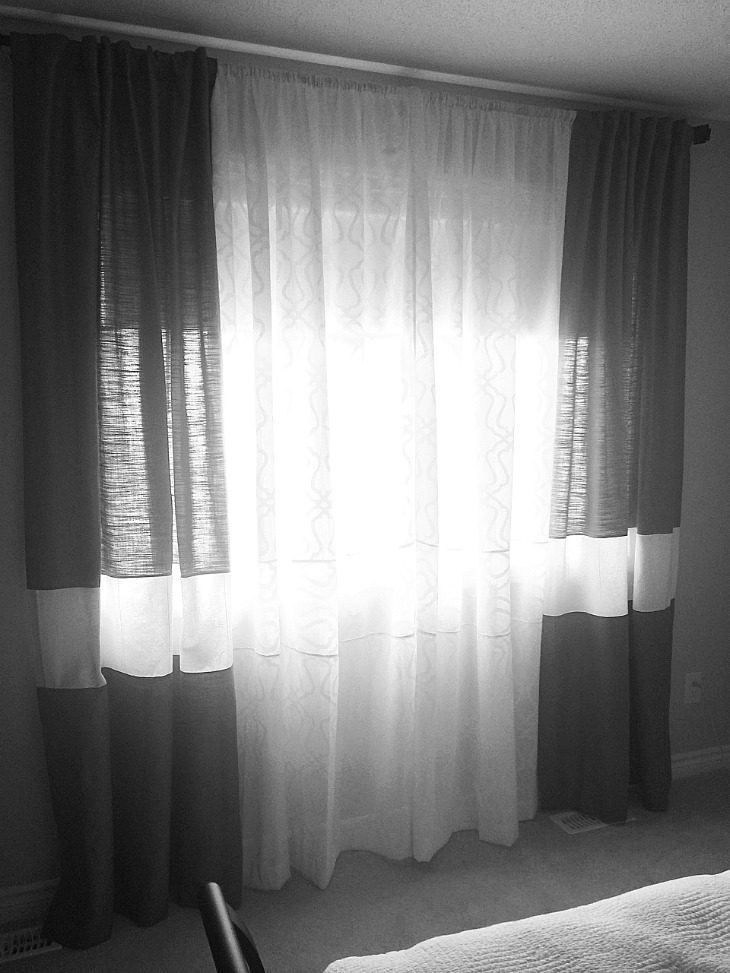
Different clients have different budgets. Custom window treatments can take one of the largest chunks out of a decor budget and some clients prefer to use their budgeted decor dollars elsewhere and are comfortable resorting to store bought window treatments. Non-custom window treatments can be the perfect solution for many applications. I often suggest embellishment to semi customize store bought window treatments. Below is an example of how I had to more than embellish store bought treatments in order to make them fit.
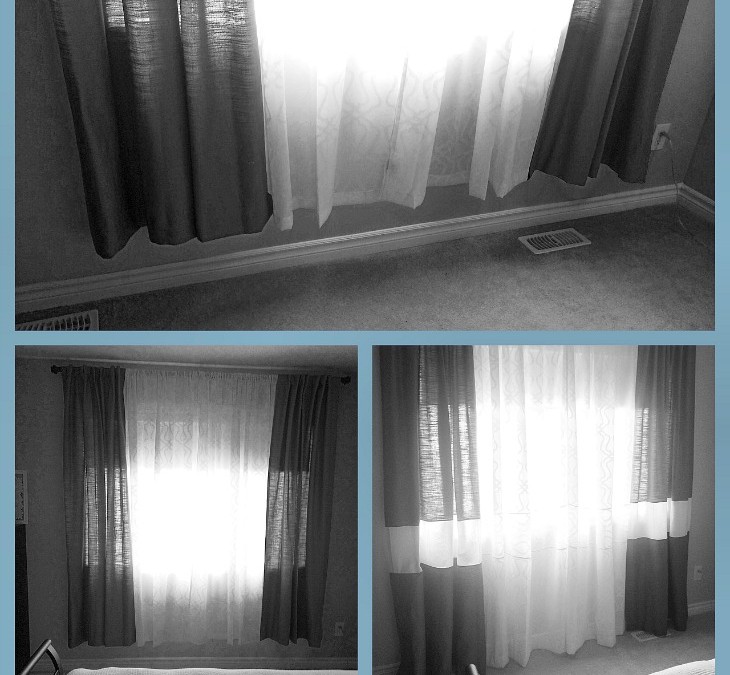
The window treatments below (both sets) are ridiculously too short, by a whopping 10″. This budget bedroom window originally had a black out roller shade but the client wanted layered window treatments to complete the look of the window and bedroom. But even budget window treatments should fit the window properly. OYE!
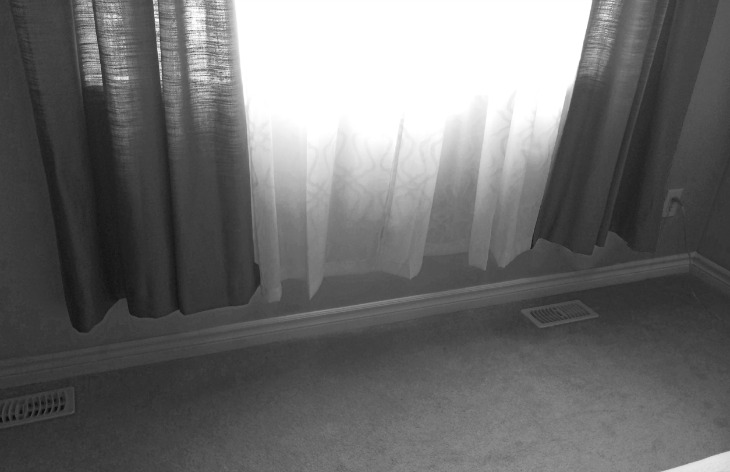
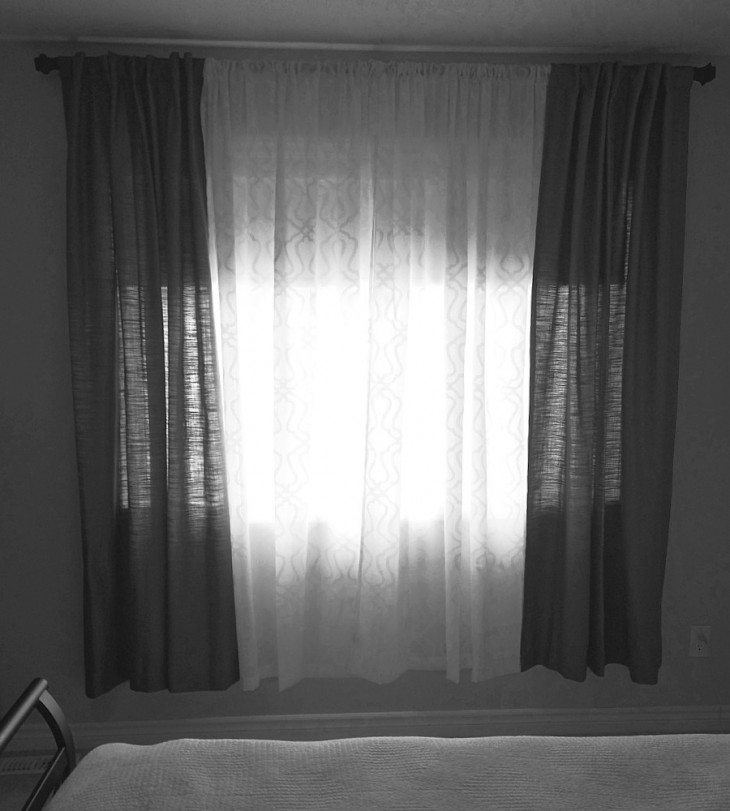
Although the window treatment rod is hung close to the ceiling (as it should be folks, makes the room and window appear larger), if it was hung just above the window frame (horrors), these window treatments would STILL be too short. Hellloooo… Target, I’m suggesting you make your window treatments longer by at least 18″ to account for taller ceilings and decent hems. I solved this issue by adding an insert to the existing panels. The inserts for the grey panels came from existing IKEA off white panels and the inserts for the patterned sheers was achieved by buying one extra sheer to use as the insert.
Solution:
To add inserts, and therefore a little interest without having to touch the hem. Yes, this can be done.
What you will need:
fabric for inserts, sewing scissors, sewing tape measure, sewing pins, sewing machine, coordinating thread, iron and ironing board, a stool for removing and re hanging and an extra pair of hands (optional) to help with the rehanging.
Instructions:
1. While panels are hanging from correct rod height, measure from the bottom of the existing hem edge to the floor / carpet …these panels were too short by exactly 10″. Make sure your measurement allows for 1/4 clearance above the floor /carpet.
2. Determine where you want the insert to be. We decided to visually have it where the lower window frame begins, or about 1/3 approximately from the bottom of the treatment. This is really an arbitrary decision, but the insert should divide the treatment in thirds, quarters, fifths…NEVER in half.
4. We needed 10″ extra inches to achieve the proper height for the finished window treatment. But seam allowances must be included before cutting the inserts. I wanted 1/2″ seams. Therefore I needed to add an extra 2″ to the 10 ” for a total of 12″ unfinished insert. *1/2″ at TOP of insert sewn onto 1/2′ of TOP existing panel = 1″ Plus 1/2″ at BOTTOM of insert sewn onto 1/2″ BOTTOM of existing panel = 1″ for a total of 2 extra inches* ** keep in mind that the 1/2″ seam allowance needed from the top and bottom of each panel reduced the overall length of the finished panels by 1″, therefore, the insert ended up being 11″, but the desired total finished length was achieved **
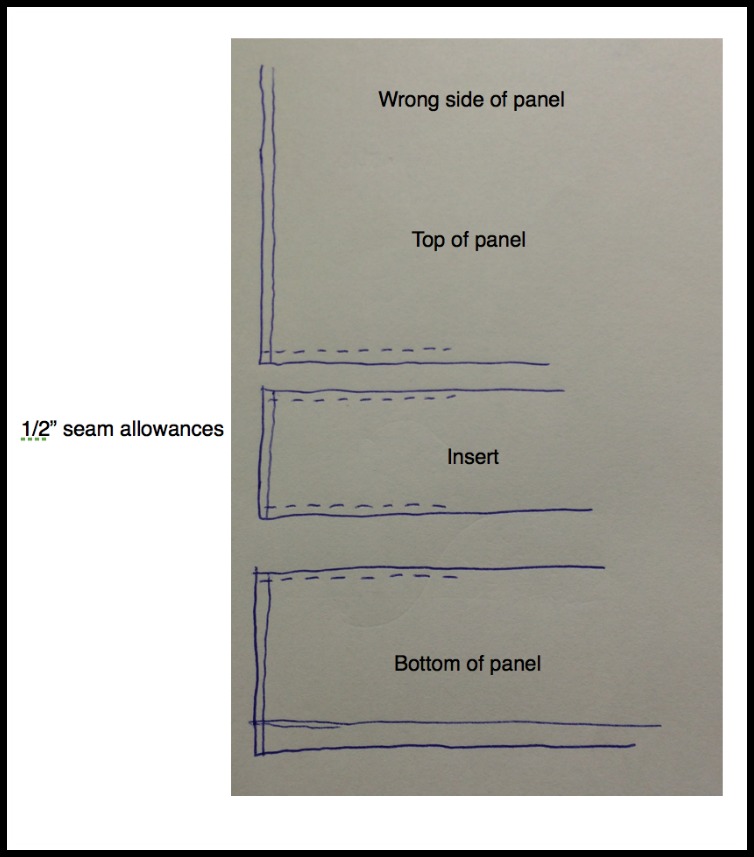
NOTE: for the patterned sheers, I knew I couldn’t match the pattern repeat, so I cut the insert lengthwise, so the pattern would purposely not match. I measured and added enough length to include the two side hems to match the existing side hems on the panels.
5. The inserts were cut to 12″ and thankfully, the IKEA inserts were only slightly wider than the panels so a quick side hem was done to make them the same width.
6. To ensure the inserts was going where we wanted them, I pinned the inserts to the panel at the desired height which in our case was 28″ from the hem edge.
7. I then cut each existing panel at the 28″ from the hem. I pinned the TOP of each cut panel to the TOP of the insert and sewed the 1/2″ seam allowance. I then pinned TOP of each panel including the newly attached insert to the cut BOTTOM of each panel and sewed 1/2″ seam allowance.
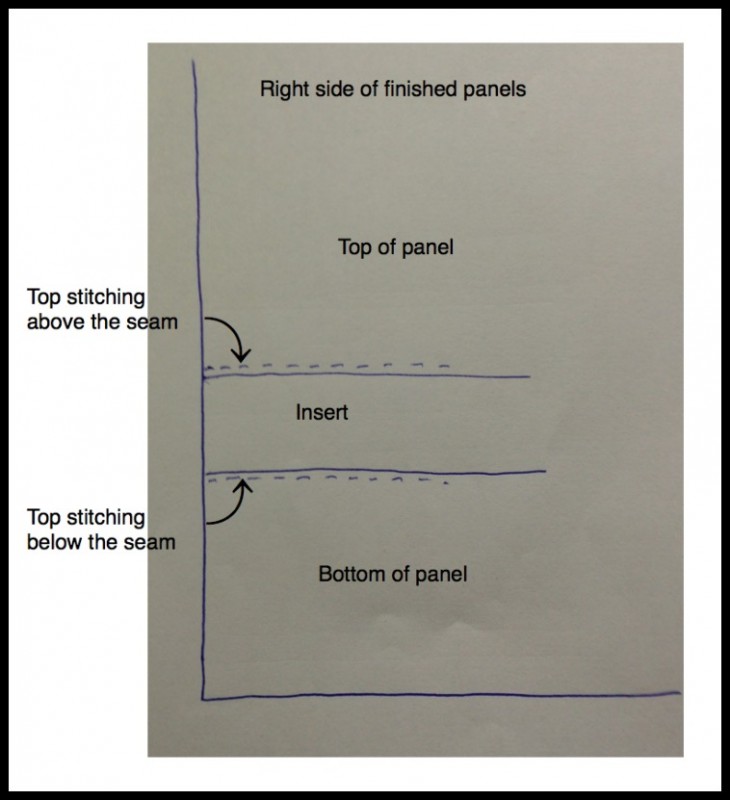
IRONING IS IMPORTANT…
8. I ironed the two seam allowances on each panel OUTWARD and then topped stitched on the RIGHT side, close to the seam edge, to hold in place.
VOILA…semi custom store bought window treatments that are not only embellished, but are now the correct height.